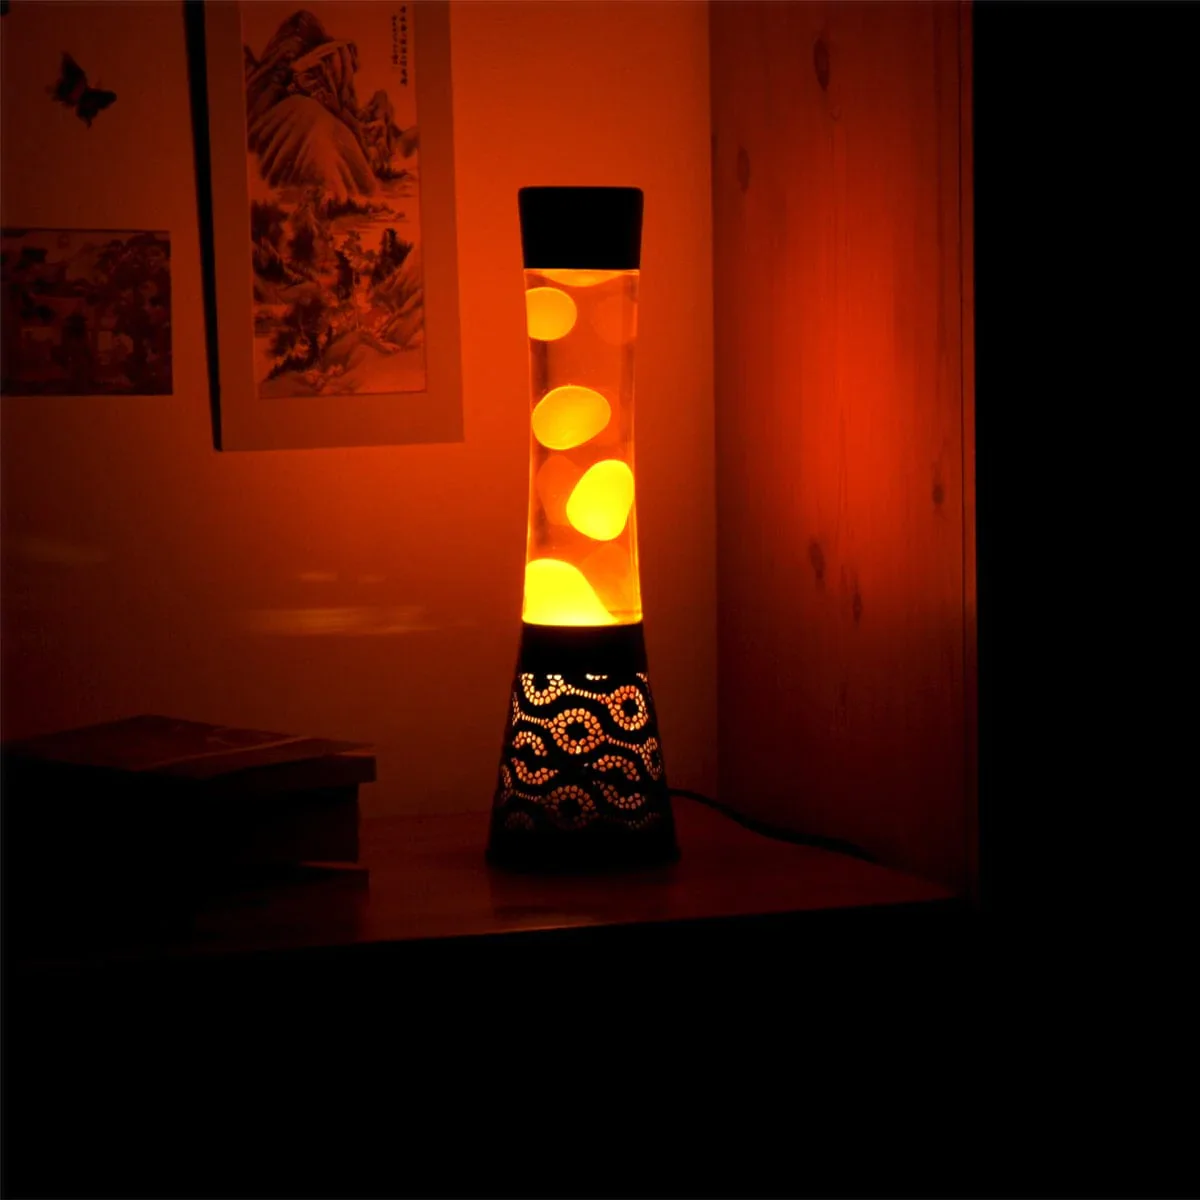
Lava lamps, iconic symbols of the 1960s and 1970s counterculture, were invented by British accountant Edward Craven Walker in 1963. Originally called the Astro Lamp, these mesmerizing decorative items quickly gained popularity for their calming, psychedelic visuals and became a staple in many homes.
Over the decades, lava lamps have continued to captivate people of all ages, their timeless appeal making them a cherished addition to any décor.
The basic principle behind a lava lamp involves the heating and cooling of wax inside a glass container filled with liquid. At the base of the lamp, a lightbulb heats the wax, causing it to expand and rise through the liquid.
As it reaches the top, the wax cools, contracts, and then sinks back down, creating a continuous, hypnotic cycle of motion. This unique process relies on the delicate balance between the density of the wax and the surrounding liquid, combined with the heat provided by the lamp’s bulb.
Despite their simplicity, lava lamps can encounter several common issues over time. Cloudiness in the liquid, wax that refuses to move or float, and overheating are among the most frequent problems faced by lava lamp owners.
These issues can often be resolved with a bit of troubleshooting and maintenance, ensuring that your lava lamp remains a beautiful and functional piece of art.
Safety Precautions Before You Start
Before you proceed with any attempts to fix a lava lamp, it is crucial to adhere to several safety precautions to ensure your well-being and the integrity of the lamp. Firstly, always unplug the lamp from the electrical outlet to eliminate any risk of electric shock.
Lava lamps operate at high temperatures, so it is essential to allow the device to cool completely before handling it. This cooling period will prevent potential burns and make it easier to manage the lamp’s components.
Handle the lamp with care to avoid breakage, as the glass can be fragile. Working in a well-ventilated area is highly recommended to ensure that any fumes released during the repair process do not accumulate. This is particularly important if you need to open the lamp and come into contact with its contents or if the wax has deteriorated.
Protective gloves should be worn during the repair process to safeguard your hands from sharp edges and substances within the lamp. If you need to perform any electrical repairs, such as fixing the lamp’s cord or replacing the bulb socket, ensure you have the proper knowledge and tools.
Electrical repairs can be hazardous and should only be attempted if you are confident in your abilities. If unsure, it is advisable to consult a professional to avoid any risks.
By taking these safety precautions seriously, you can effectively and safely fix a lava lamp. Proper preparation and a cautious approach will help prevent accidents and ensure a successful repair process. Always prioritize safety to preserve both your well-being and the functionality of your lava lamp.
Diagnosing the Problem
When attempting to fix a lava lamp, the first step is to diagnose the problem accurately. Lava lamps can exhibit several common issues, such as the wax not floating properly, the liquid becoming cloudy, or the lamp not heating up. Identifying these symptoms correctly is crucial for effective troubleshooting.
One of the primary issues is the wax failing to float or move correctly. This can often be attributed to the lamp not reaching the appropriate operating temperature. To check this, ensure that the bulb is functioning correctly.
A burnt-out bulb or an incorrect wattage can impede the heating process. Additionally, the wax consistency should be examined. If the wax appears too solid or too liquid, it may indicate a temperature regulation issue or that the lamp has been shaken, causing the wax to break apart.
Another common problem is the liquid inside the lamp becoming cloudy. This can occur due to impurities in the liquid or the introduction of foreign particles. Moving the lamp too frequently or mishandling it can exacerbate this issue.
The clarity of the liquid should be assessed by observing the lamp in a well-lit environment. If the liquid appears murky, it might be necessary to replace it or seek professional cleaning solutions.
Lastly, if the lamp is not heating up at all, this could point to electrical issues. Verify that the lamp is properly plugged in and that the outlet is functioning. Inspect the power cord for any visible damage or wear.
Additionally, ensure that the lamp has not been placed in an overly cold environment, as this can affect its ability to heat up.
By carefully observing these symptoms and potential causes, you can pinpoint the exact issue with your lava lamp. This diagnostic process is essential to determine the appropriate steps for fixing it, ensuring the lamp can return to its vibrant and mesmerizing state.
Fixing Cloudy Liquid

A common issue with lava lamps is the appearance of cloudy liquid, which can significantly detract from its aesthetic appeal. To fix a lava lamp with cloudy liquid, careful steps must be taken to either clean or replace the existing liquid. Here’s a comprehensive guide to ensuring a crystal-clear solution in your lava lamp.
First, ensure that the lamp is unplugged and completely cool before starting any maintenance. Begin by gently unscrewing the cap and carefully pouring out the old liquid into a separate container.
This step requires cautious handling to avoid disturbing the wax at the bottom. If the wax is still intact and not fragmented, you can proceed with cleaning the liquid.
To clean the existing liquid, filter it through a fine mesh or a coffee filter to remove impurities. Once filtered, you may choose to reuse it or prepare a fresh mixture.
If you opt for a new solution, use distilled water as the base. Distilled water is preferred because it is free from minerals and impurities that can cloud the liquid over time.
Mix the distilled water with a few drops of dishwashing liquid and a pinch of Epsom salt. The dishwashing liquid helps to break surface tension, while the Epsom salt ensures the correct density for the wax to function properly.
The ratio is crucial; typically, 95% distilled water to 5% dishwashing liquid and salt mixture is recommended.
Carefully pour the new solution back into the lamp, ensuring to maintain the correct liquid-to-wax ratio. The liquid should cover the wax by about an inch.
Secure the cap tightly and allow the lamp to settle for a few hours. Once the lamp is sealed, plug it back in and let it heat up. The wax will eventually start to flow in the clear liquid, restoring the lamp to its former glory.
Maintaining the correct liquid-to-wax ratio is vital for the proper functioning of the lava lamp. An imbalance can result in either the wax not rising or the liquid becoming cloudy again.
Regular checks and proper maintenance can prolong the life of your lava lamp, ensuring it remains a mesmerizing centerpiece.
Getting the Wax to Flow Properly
Ensuring the proper flow of wax in a lava lamp is crucial for its optimal performance and aesthetic appeal. If the wax in your lamp is not moving or floating properly, there are several steps you can take to address the issue.
Firstly, positioning is key; make sure that your lava lamp is placed on a flat, stable surface in a room with a consistent temperature. This helps maintain an even heat distribution which is essential for the wax to flow smoothly.
Another important factor is the bulb wattage. Using the right wattage bulb as specified by the manufacturer is critical. A bulb that is too weak may not generate enough heat to melt the wax, while a bulb that is too strong can overheat the lamp, potentially causing damage.
Always replace the bulb with one that matches the recommended wattage to ensure optimal functionality.
Blockages can also hinder the movement of wax. It’s advisable to inspect your lava lamp for any obstructions that might be affecting the flow. If you notice any, gently remove them with caution to avoid damaging the lamp.
Sometimes the wax can get stuck at the bottom; in such cases, you might need to reheat and redistribute the wax.
A method to reheat the wax involves turning the lamp on and off at intervals. Allow the lamp to warm up for about an hour, then switch it off and let it cool down before turning it back on. This cycle can help in breaking up clumps of wax and promote smoother movement.
Additionally, gently shaking the lamp can sometimes help redistribute the wax, but this should be done with extreme caution to prevent any damage.
Maintaining the correct temperature is also essential for keeping the wax flowing smoothly. Lava lamps typically operate best in a room temperature environment; extreme cold or heat can negatively affect the performance.
By following these steps and ensuring proper maintenance, you can enjoy the mesmerizing flow of your lava lamp for years to come.
Replacing the Bulb or Electrical Components
When attempting to fix a lava lamp, one of the most common issues is a burnt-out bulb or malfunctioning electrical components. Identifying and replacing these components can restore your lava lamp to its former glory.
The first step is to determine the correct type of replacement bulb. Most lava lamps use a specific type of incandescent bulb, usually indicated on the lamp’s base or in the user manual. Ensure that the wattage of the new bulb matches the original to avoid overheating or insufficient illumination.
To replace the bulb, start by unplugging the lava lamp to ensure safety. Allow the lamp to cool down completely before handling it, as the glass and bulb can become hot during operation. Gently remove the globe from the base and locate the bulb.
Carefully unscrew the old bulb and dispose of it properly. Screw the new bulb into place, ensuring it is secure but not overly tight, as this can damage the socket.
Next, inspect the wiring and connections within the lamp base. Look for any visible signs of damage, such as frayed wires or loose connections. If you notice any issues, it may be necessary to repair or replace these components.
For minor repairs, you can use electrical tape to secure loose wires or reconnect them if they have become detached.
However, if the damage appears extensive or you are unsure how to proceed, it is advisable to seek professional assistance to avoid potential hazards.
After replacing the bulb and checking the electrical components, reassemble the lava lamp by placing the globe back onto the base. Plug the lamp in and turn it on to test whether the issue has been resolved. If the lamp still does not function correctly, further troubleshooting may be required.
Persistent electrical problems may indicate a deeper issue that necessitates professional repair. Always prioritize safety and do not attempt repairs beyond your skill level.
Preventive Maintenance Tips
Proper maintenance is crucial in preserving the functionality and longevity of your lava lamp. To avoid the need to fix a lava lamp frequently, adhere to several preventive measures.
Firstly, limit the usage duration of your lava lamp to between 6 to 8 hours. Continuous operation beyond this period can cause overheating, potentially damaging the wax or the lamp’s internal components.
Positioning the lava lamp correctly is another vital aspect of maintenance. Ensure that the lamp is placed away from direct sunlight or extreme temperatures.
Exposure to intense heat sources can cause the wax inside the lamp to degrade, while excessively cold environments can hinder the lamp’s ability to operate efficiently. An optimal room temperature ranging between 68°F to 77°F (20°C to 25°C) is ideal for maintaining the lamp’s performance.
Regularly check the condition of your lava lamp’s components. Inspect the cord and plug for any signs of wear and tear, as damaged electrical components can pose safety hazards.
Additionally, verify that the bulb is functioning correctly; a flickering or dim bulb can indicate it needs replacement. Always use the manufacturer’s recommended bulb type to ensure compatibility and avoid overheating.
Following the manufacturer’s guidelines is essential for effective maintenance. These guidelines often contain specific instructions tailored to the particular model of your lava lamp.
Adhering to these recommendations will help you avoid common pitfalls and ensure optimal performance. Periodic maintenance, such as gently swirling the lamp to prevent the wax from settling, can also be beneficial.
By implementing these preventive maintenance tips, you can significantly extend the life of your lava lamp, ensuring it remains a captivating and functional addition to your home decor.
Regular attention to usage duration, proper positioning, and component inspection will prevent many common issues, reducing the need for more extensive repairs.
Conclusion and Final Thoughts
In this comprehensive guide on how to fix a lava lamp, we’ve covered various crucial steps to ensure a smooth and effective repair. From diagnosing common issues like cloudiness and wax separation to addressing heating problems, each step requires careful attention and patience.
Safety remains paramount throughout the entire process; always ensure that the lamp is unplugged and cooled down before attempting any repairs.
Proper maintenance is key to prolonging the lifespan of your lava lamp. Regularly checking the bulb, base, and fluid levels can prevent many common issues.
Avoid shaking or moving the lamp while it’s warm to prevent the wax from breaking apart or becoming cloudy. By following these guidelines, you can enjoy the mesmerizing effects of your lava lamp for years to come.
We encourage you to be methodical and patient in your approach. Fixing a lava lamp can be a rewarding experience, but it requires time and care. If you encounter any difficulties, do not hesitate to revisit the steps outlined in this guide or consult additional resources.
Feel free to share your own experiences or ask questions in the comments section below; your insights and inquiries can be valuable to fellow readers.
For those seeking further information, we have provided links to additional resources and related articles. These include more detailed troubleshooting tips, advanced repair techniques, and maintenance advice. By staying informed and engaged, you’ll be better equipped to handle any issues that may arise with your lava lamp.
Thank you for taking the time to read our guide. We hope it has been helpful and informative. Happy fixing!


